A backyard greenhouse changes the way you think about gardening. Instead of being at the mercy of late frosts, surprise hailstorms, and a calendar telling you it is too early or too late, you are working in a space you actually control. You decide when the season starts. You decide when it ends.
But a greenhouse is not magic. An unheated greenhouse in Zone 5 will not keep tropical plants alive in February. It will not eliminate pest problems. And it can actually kill plants faster than the outdoors if you do not manage heat and humidity. Overheating is one of the most common mistakes new greenhouse owners make, and it often looks like this: wilted tomato seedlings on a 70°F April afternoon because the interior temperature hit 110°F.
This guide to greenhouse gardening for beginners covers what you actually need to know before and during your first season. Not theory, but practical decisions, honest expectations, and the mistakes that trip up almost every first-timer.
How Do You Use a Greenhouse for Beginners?
To start greenhouse gardening, choose a greenhouse slightly larger than you think you need and place it where it gets at least 6 hours of direct sun. Set up a thermometer on day one. Start with forgiving crops like lettuce, herbs, and tomatoes. Focus on ventilation — more beginners lose plants to overheating than to cold.
At its simplest, a greenhouse is an enclosed structure with glazing (transparent or translucent walls and roofing) that traps solar energy to create a warmer, controlled environment for growing plants. Sunlight passes through the glazing, warms the surfaces inside, and that warmth gets held in by the structure. Common glazing options include glass, polycarbonate panels, and plastic film, each varying in cost, insulation, and light transmission. The right choice affects how much sunlight reaches your plants and how well the greenhouse holds heat, which is why it gets its own section below.
On a sunny day, a well-ventilated greenhouse typically runs 20–30°F warmer than the outside air. Close it up and that gap can jump to 40–50°F or more, which is how a sunny 50°F day produces a comfortable 75–85°F interior with the vents open, or a dangerous 100°F+ interior if everything is sealed. In practice, this means you can start planting 6–8 weeks earlier in spring and keep growing 6–8 weeks later into fall. That is roughly three extra months of production per year without spending a dime on heating.
How to Use a Greenhouse: What It Can and Cannot Do
A greenhouse gives you meaningful control over your growing season: earlier starts, later finishes, and protection from the frost, wind, hail, and heavy rain that wreck outdoor gardens. You control the watering schedule, influence the humidity, and create a stable environment where young seedlings can establish themselves without the stress of unpredictable weather. For crops like tomatoes, peppers, and cucumbers, the consistent warmth of a greenhouse translates directly into earlier harvests and a longer production window than most outdoor growing allows.
What a greenhouse cannot do is create a tropical environment by default. Once the sun goes down, the greenhouse temperature inside follows the temperature outside, just slower and not quite as low.
How much warmth your greenhouse holds depends on insulation and thermal mass. Thermal mass is simply heat storage — materials like water, stone, and soil absorb warmth during sunny hours and release it slowly after dark. A greenhouse with a few black water jugs along the back wall holds warmth noticeably longer overnight than an empty one. The same mass also absorbs excess heat during the day, which helps moderate the afternoon temperature spikes that catch beginners off guard. If it is 20°F outside overnight, a typical unheated greenhouse might hold 22–28°F, depending on how much insulation and thermal mass you have.
Multi-wall polycarbonate holds warmth longer than single-pane glass, but no unheated greenhouse stays frost-free when outside temperatures drop well below freezing. If you want to grow through a northern winter, you will need supplemental heat. And the insulation quality of your greenhouse panels determines how much heat, and how much money that takes.
This is why glazing material matters. Single-pane glass has an R-value of ~0.9, meaning heat escapes quickly overnight. Standard 6mm twin-wall polycarbonate (the type found in most budget greenhouse kits) improves on that at ~1.6. Our commercial-grade 10mm 4-wall polycarbonate rates ~2.1, which translates to roughly 30% better heat retention than twin-wall polycarbonate. In practice, that means significantly less heat loss during cold nights and shoulder-season cold snaps, and real dollars saved if you are heating. Our polycarbonate vs. glass comparison breaks down R-values, durability, cost, and climate fit across all four glazing types.
How to Start a Greenhouse: The 5 Decisions That Matter
1. Size: Vertical Capacity Matters More Than Floor Area
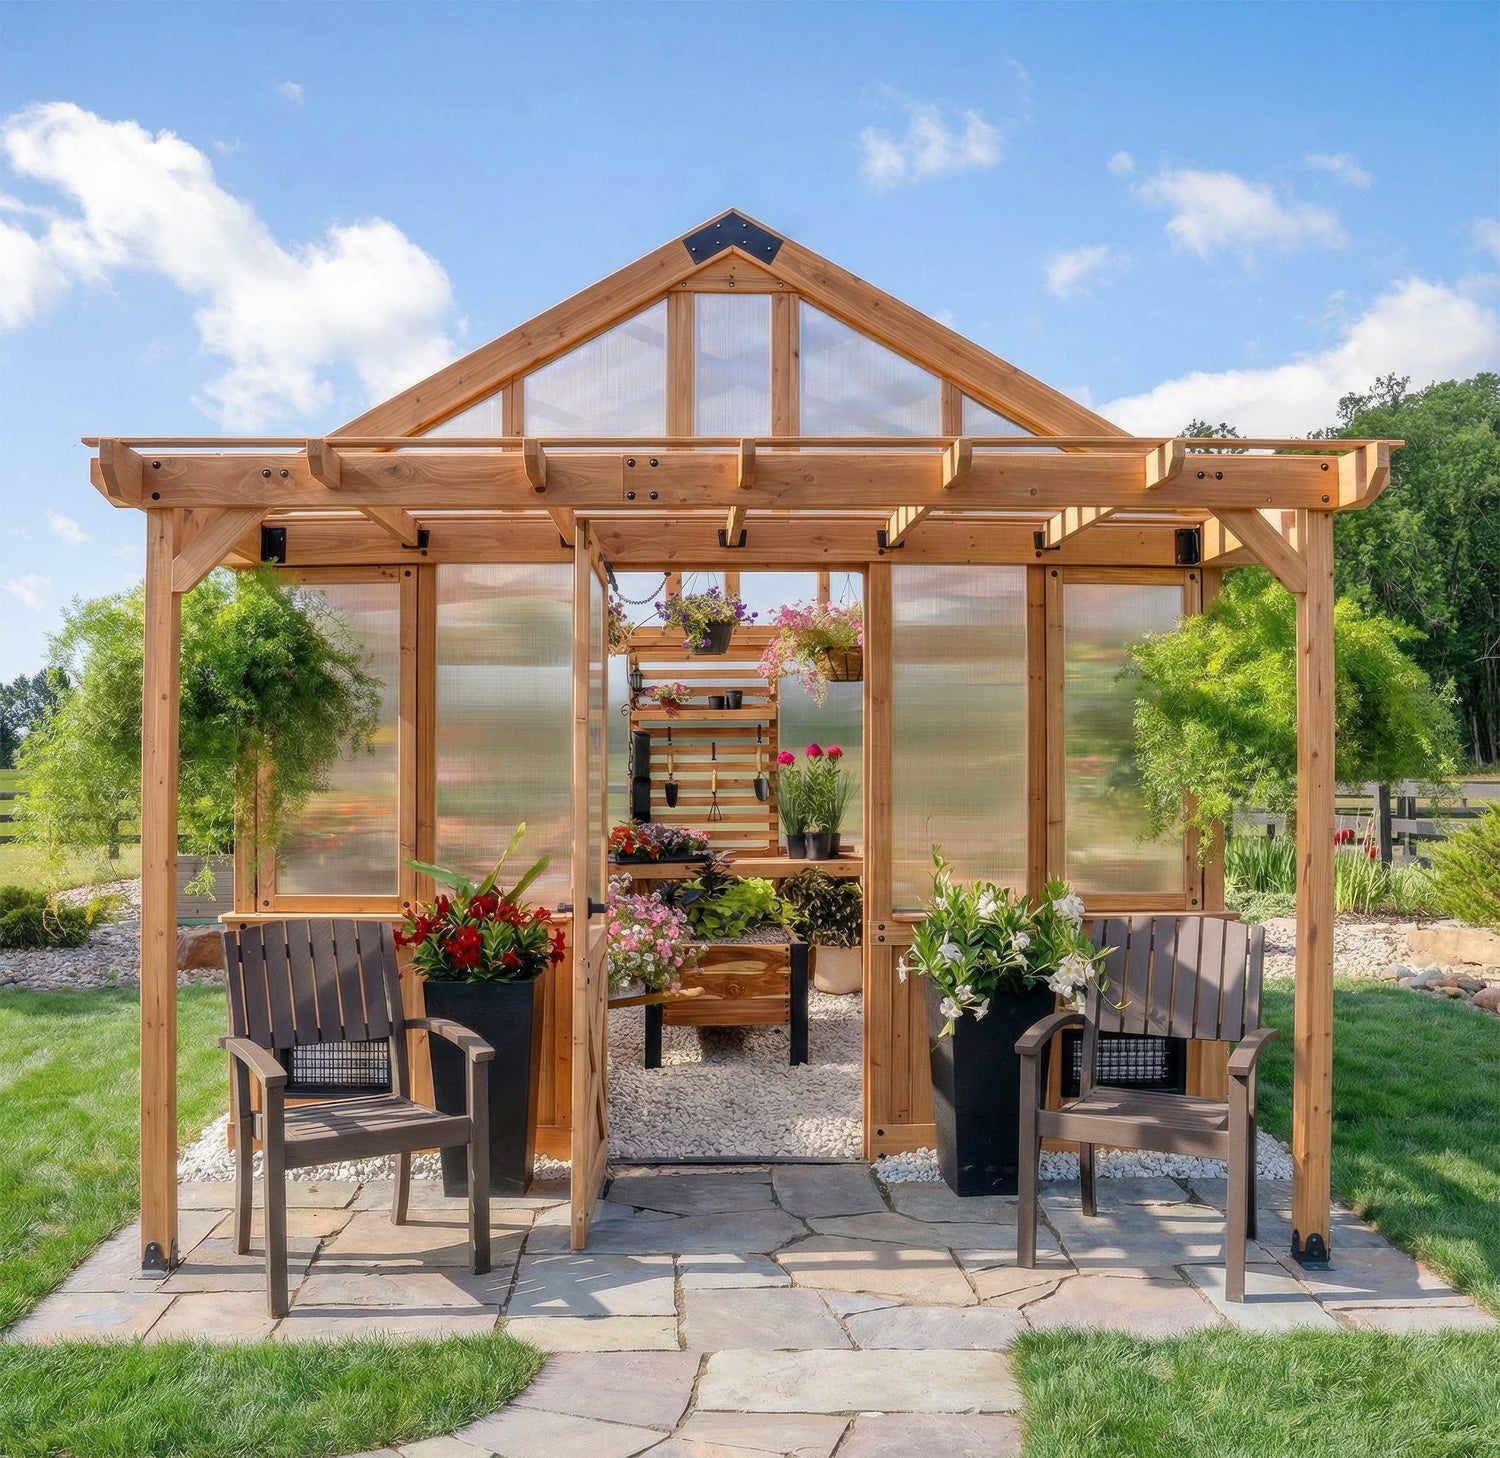
Effective growing space depends more on vertical capacity than floor area. A 9x6 greenhouse like our Poppy with 26 linear feet of staging shelves and moveable plant hooks uses its vertical space so effectively that your actual growing capacity is far greater than the floor plan suggests, because you are using three dimensions, not two. The key is choosing a model that maximizes growing capacity per square foot: shelving, hooks, and a workstation that lets you grow up, not just out.
That said, if you have the yard space and the budget, more room is always welcome. Most experienced greenhouse owners say the same thing: "I wish I had gone bigger." In the 70 to 100+ square foot range, you get the most room to grow into. But if your yard or budget points you toward a compact footprint, prioritize that vertical infrastructure — built-in shelving, plant hooks, a workstation — before you prioritize square footage.
2. Glazing Material: Polycarbonate vs. Glass
For most home greenhouse owners, 4-wall polycarbonate is the better choice with an R-value of ~2.1. It insulates significantly more than both single-pane glass (R-value ~0.9) and standard twin-wall polycarbonate (R-value ~1.6), weighs less, and is approximately 300 times more impact-resistant than standard glass and significantly stronger than twin-wall panels. It also diffuses light better than twin-wall or glass, which means fewer hot spots and more consistent growth across your shelves. Glass looks beautiful and lasts a long time, but it is heavier, more fragile, and loses heat faster. If you want the full breakdown, we put together a detailed comparison of polycarbonate and glass greenhouse glazing.
3. Frame Material: Wood vs. Metal
Cedar frames insulate well, blend naturally into a backyard setting, and resist rot and insects without chemical treatment — though like any wood, they benefit from periodic maintenance over time. For most buyers, the glazing material has a larger impact on overall heat retention than the frame material, but cedar's natural insulating properties are a genuine advantage if you plan to heat through winter. If you go with cedar, look for FSC certification and kiln-drying. The first verifies the wood was sustainably sourced, and the second stabilizes it against warping and cracking once the greenhouse is up. Metal frames vary widely in quality. Lightweight aluminum-only structures are common at the budget end, but a heavy-duty galvanized steel and aluminum combination offers significantly more strength, rigidity, and longevity. The right choice comes down to your priorities. Cedar appeals if you value energy efficiency and a natural aesthetic. A robust galvanized steel and aluminum frame is a strong fit if you want a seriously durable, low-maintenance structure.
4. Ventilation: More Important Than You Realize
This is where beginners get burned. A sealed greenhouse on a sunny spring day becomes an oven. Optimal air exchange requires both passive and forced ventilation. Passive ventilation means operable windows or vents, which are reliable but manual. Forced ventilation adds an exhaust fan near the roofline, paired with intake vents low on the opposite wall, pulling cool air in while pushing hot air out. The best setup is a thermostatically controlled exhaust fan that kicks on automatically when temperatures hit a set threshold, so you do not have to babysit the greenhouse every afternoon.
Every Backyard Discovery greenhouse includes both passive and thermostat-activated forced ventilation as standard rather than selling them as add-ons. Our ventilation guide covers fan sizing, seasonal strategies, and humidity control in detail.
5. Features That Save You Headaches Later
Three features that seem like luxuries until you don't have them:
Electrical outlets inside the greenhouse. You will want to plug in a heat mat for seed starting, maybe a small fan for air circulation, possibly grow lights in late winter. Running an extension cord from your house through the greenhouse door is a pain, and it prevents the door from closing properly, which defeats the purpose of a climate-controlled space. Backyard Discovery's greenhouses include a patented PowerPort™ (three outlets and three USB ports) built into the structure, which solves this from day one.
A hose hookup. Your greenhouse plants need water every day in summer, sometimes twice. Hauling a watering can from the house gets old fast. An exterior and interior hose hookup lets you connect a garden hose and water without leaving the greenhouse.
Built-in staging shelves. Shelf space is growing space. Most greenhouse kits on the market do not include staging shelves at all, so you have to source and add them yourself, which typically costs $150–$450 aftermarket. Look for greenhouses that come with built-in shelving you can configure for your needs. A greenhouse with 26+ linear feet of staging gives you dramatically more growing capacity than one where you are starting from an empty shell.

Backyard Greenhouse Setup: Where to Put It and How to Prepare the Site
Your greenhouse will only perform as well as the site underneath it. Sunlight, drainage, and a level foundation all affect how your plants grow and how much maintenance you deal with season to season.
Permits and HOA rules: Before you choose a spot, check your local building permit requirements and your HOA rules if applicable. Many municipalities require permits for permanent outdoor structures above a certain size, commonly 120 to 200 square feet, and some require permits regardless of size. Your county building department can tell you in a five-minute call. A quick check upfront costs nothing; discovering a violation after installation can be expensive.
Sunlight: Your backyard greenhouse needs at least 6 hours of direct sun per day, ideally from the south or southeast. Morning sun is especially valuable because it warms the greenhouse early and starts photosynthesis sooner. If you have to choose between morning and afternoon sun, choose morning.
Level ground: The site needs to be flat. Not "close enough" flat, but actually level. An uneven foundation means doors that do not close, panels that do not seal, and water that pools on one side. If you have an existing level concrete patio, paved surface, or hardscaped area, that works as-is for most kit greenhouses — check your specific model's installation guide for anchoring requirements. For new installations on bare ground, a compacted gravel pad ($100–$400 in materials depending on your region) is the most common and easiest foundation. On clay-heavy soils, add a layer of woven geotextile fabric (not lightweight landscape fabric, which breaks down quickly under gravel) to improve drainage. Read our foundation guide for more information.
Proximity to water and power: You will want a garden hose within reach and, ideally, an outdoor electrical outlet within 50 feet. This makes connecting hose hookups and powering accessories straightforward.
Wind protection: Even a structure rated for serious weather performs better with some shelter. Backyard Discovery greenhouses are engineered to a 100 mph wind rating and 50 lbs/ft² snow load, but a fence, a hedge, or the lee side of the house still helps with heat retention and reduces day-to-day stress on the panels and seals. Avoid spots that get hammered by prevailing winds if you can.
Greenhouse Temperature and First-Season Setup
The first few weeks inside a new greenhouse are mostly about learning how your specific structure behaves: how fast it heats up on a sunny morning, how quickly it cools after dark, and where the hot spots and cold pockets are.
Hang a Thermometer
This is the single most important thing you will do in your first week. A simple digital min/max thermometer ($12–25) shows you the current temperature, today's high, and last night's low. Within three days, you will understand your greenhouse's temperature personality: how hot it gets on sunny afternoons, how cold it drops overnight, and how fast the swings happen. This information drives every decision you will make about planting, ventilation, and heating. Hang it at plant height, out of direct sun.
Run a Ventilation Test
On the first warm, sunny day after setup, go into the greenhouse at noon and check the thermometer. If it is over 85°F, you need more airflow. Open the windows. Make sure the exhaust fan is working. If it is still too hot with everything open, you may need shade cloth on the south-facing side during summer.
Choose Your Growing Media
Most greenhouse beginners start with pots, grow bags, and seed trays on staging shelves, and for those, a quality potting mix is all you need. Use a standard seed-starting mix for germination trays and a general-purpose potting mix for transplanting into larger containers. Avoid filling containers with native garden soil; it drains poorly in enclosed spaces and can introduce diseases your plants have no defense against. If your greenhouse is large enough for raised beds on the floor, a mix of roughly 60% topsoil or loam, 30% finished compost, and 10% perlite or coconut coir provides good drainage and nutrition.
Plan Your Layout
Staging shelves along the walls, taller plants on the floor in the center where there is headroom, seed trays on the sunniest shelf. Keep walkways wide enough to move through comfortably while carrying watering cans and pots. Leave space near the door for tools and supplies. The goal is to use vertical space (shelves, hooks) to maximize growing area without making the greenhouse feel cramped.
Budget for Your First Season
Your day-one essentials beyond the greenhouse itself are relatively modest — a thermometer ($12–25), a garden hose ($15–30), seed-starting supplies ($20–50), and potting mix ($30–60) will get you growing for roughly $75–$165 depending on what you already have on hand. That covers the basics, not the full picture. Most greenhouse owners end up adding a Wi-Fi thermometer ($30–70), a drip irrigation timer ($20–50), and basic grow lights ($25–60) within the first season or two as they figure out what their setup actually needs. Factor in another $75–$180 for the upgrades if you want a realistic year-one number.
Greenhouse Planting Calendar: What to Grow and When
If you are wondering what to grow in a greenhouse during your first year and when to plant it, this planting calendar breaks it down by month and USDA zone. Find your zone and follow the timeline that matches. You can look up your zone at the USDA Plant Hardiness Zone Map.

Your local cooperative extension service can give you exact planting dates for your county. These are the gold standard for greenhouse gardening advice and they are free.
The calendar above shows you what to grow and when. The crop list below answers which plants to prioritize in your first year and why each one suits a beginner.
Best Greenhouse Plants for Beginners: 10 Crops That Forgive Mistakes
Start with crops that can handle inconsistent watering, temperature swings, and the occasional neglect. You'll build confidence quickly and eat well while you do it.
Lettuce and salad greens. Fast-growing, cold-tolerant, and almost impossible to mess up. You can harvest baby leaves in 30–45 days depending on temperature and light (head lettuce takes 55–75 days). They actually prefer the cooler temperatures of a spring or fall greenhouse.
Herbs (basil, cilantro, parsley, chives, mint). Small footprint, high reward. They do well on staging shelves where they get good light and airflow. Mint is especially forgiving. Just give it its own pot or it will take over.
Tomatoes. The reason most people buy a greenhouse. Start seeds 6–8 weeks before last frost, transplant into large pots or greenhouse beds, and starting that early means your first harvest can come 3–4 weeks ahead of outdoor-planted crops, depending on variety and zone. They need consistent watering, warm temps (60–85°F), and pollination help in a closed greenhouse (see pollination note below).
Peppers. Love heat, so a greenhouse is their happy place. Slower than tomatoes to produce, but the flavor of greenhouse-grown peppers is worth the wait. Like tomatoes, they need pollination help in an enclosed greenhouse.
Cucumbers. Thrive in greenhouse heat and produce abundantly. Train them vertically on a trellis or string to save floor space. They require pollination — either let pollinators in by opening the door during bloom, or hand-pollinate with a small brush (see below). Good airflow is essential, because high humidity in an enclosed greenhouse is the primary cause of powdery mildew on cucumbers.
Spinach. Cold-hardy, quick to germinate, and perfectly suited for fall and early spring greenhouse growing. It will handle light frosts that would damage most crops.
Kale. Virtually indestructible. Can survive unheated greenhouse conditions into December in many zones. Pick the outer leaves and the plant keeps producing.
Radishes. Ready to eat in 28–40 days. Great for filling gaps between other crops and for teaching kids about greenhouse gardening.
Strawberries. Thrive in greenhouse warmth and produce earlier than outdoor plants. Ever-bearing varieties produce continuously from late spring through fall. Small footprint, high reward, and a genuine crowd-pleaser for first-timers.
Swiss chard. Colorful, cold-tolerant, and productive over a long season. One of the most underrated greenhouse plants for beginners.
A Note on Pollination
Tomatoes, peppers, and cucumbers all require pollination to set fruit. In an outdoor garden, bees and wind handle this automatically. In a closed greenhouse, pollinators cannot get to your plants. You have two options: open the greenhouse door during the day when flowers are blooming to let pollinators in, or hand-pollinate. For tomatoes and peppers, gently shake each flower cluster every few days when flowers are open, or hold a vibrating electric toothbrush briefly against the stem behind the cluster — this mimics the vibration of a bumblebee and works well. For cucumbers, a small paintbrush transferred between male and female flowers does the job. A small fan moving air across the blooms also helps. Skip this step and you will get plenty of flowers but almost no fruit.

Greenhouse Gardening Mistakes: 5 Errors That Trip Up First-Timers
The five most common greenhouse gardening mistakes beginners make are: underestimating heat buildup, overwatering, starting too many varieties, ignoring pest prevention, and failing to monitor temperature.
1. Underestimating Heat Buildup
This is the big one. More greenhouse plants die from overheating than from cold. A closed greenhouse can reach 110°F or higher on a sunny day. That is not a typo. If your greenhouse does not have ventilation that works automatically, including a thermostat-activated exhaust fan and at least one operable window, you will need to open it up manually every morning and close it every evening. Miss one hot afternoon and you can lose an entire shelf of seedlings.
2. Overwatering in a Humid Environment
Outdoors, excess water evaporates and drains away. Inside a greenhouse, it has nowhere to go. Overwatering raises humidity, promotes fungal disease, and drowns roots. Water when the top inch of soil is dry, not on a calendar. And always water in the morning so the moisture has time to evaporate before the cooler evening.
Water at the base of plants rather than overhead to keep foliage dry and reduce fungal disease. A watering wand with a gentle rose attachment prevents soil displacement in seed trays. Once you are comfortable with your greenhouse's needs, a simple drip irrigation timer ($20–50) can automate daily watering and save you significant time during peak summer.
3. Starting Too Many Varieties at Once
It is tempting to fill every inch of shelf space with seed trays. Resist. Start with 5–7 varieties you actually want to eat. Learn how they behave in your specific greenhouse. Add more next season once you have a feel for your space.
4. Ignoring Pest Prevention
A greenhouse is a paradise for aphids, whiteflies, and fungus gnats. Inspect your plants weekly, paying special attention to the undersides of leaves. Good airflow from fans and open windows is your first line of defense. If you are bringing plants in from outside, quarantine them for a few days to make sure they are not carrying hitchhikers.
5. Not Monitoring Temperature Daily
You need to know what is happening inside your greenhouse even when you are not standing in it. At minimum, check a min/max thermometer every morning. Better yet, set up a Wi-Fi thermometer ($30–70) that sends an alert to your phone if the greenhouse temperature drops below 35°F or climbs above 95°F. It will save you from discovering problems after the damage is done. If your greenhouse has built-in electrical outlets, you can plug a Wi-Fi sensor right in with no extension cords.
What to Expect in Year Two and Beyond
Your first season is about learning the rhythm: how your greenhouse heats up, how quickly it cools down, when to water, when to vent. You will make mistakes. That's fine. Every experienced greenhouse gardener has a story about the time they forgot to open a vent and roasted their seedlings.
By year two, you will feel confident enough to push the boundaries. Succession planting, where you sow a new tray of lettuce or herbs every three weeks instead of all at once, gives you a continuous harvest rather than a feast-then-famine cycle. A basic drip irrigation system ($40–80 for a timer and emitter kit) handles daily watering automatically and cuts down on the fungal disease that comes from overhead watering. Between seasons, top-dress your beds with two inches of fresh compost to replace the nutrients your crops pulled out. And a single layer of floating row cover (a lightweight, breathable fabric draped directly over plants to trap warmth) inside the greenhouse extends the cold tolerance of your greens by an additional 5–8°F, which is enough to keep spinach and mache producing through January in Zone 6 with no supplemental heat.
By year three, you will wonder how you ever gardened without it.
If you've read this far, you know what to look for: multi-wall polycarbonate for insulation, reliable ventilation, built-in electrical access, and enough shelf space to actually use the footprint you're paying for. Backyard Discovery is built around every item on that list. The cedar is FSC-certified and kiln-dried. The polycarbonate is 10mm 4-wall, rated at R-2.1. Every model is engineered to a 100 mph wind rating and 50 lbs/ft² snow load, with a thermostat-activated exhaust fan, PowerPort™ power, an interior spigot, staging shelves, a slat wall, and plant hooks all included as standard. Everything arrives pre-cut and pre-drilled, assembled with the BILT® app, and backed by a 5-year warranty that covers the whole greenhouse rather than just the frame.
Browse Backyard Discovery greenhouse collections to find the right fit for your yard.
Greenhouse Gardening for Beginners: Frequently Asked Questions
Is a backyard greenhouse worth it for a beginner?
For most home gardeners, yes. A greenhouse pays for itself in extended growing time. For instance, in zones 5–7, expect 6–8 extra weeks in spring and fall without supplemental heat. The gain is bigger in warmer zones and smaller in colder ones, where adding heat makes the real difference. If you grow vegetables, the value of earlier tomatoes, longer pepper seasons, and year-round greens adds up. The learning curve is real but manageable, especially if you start with forgiving crops and invest ten minutes a day checking temperature and watering.
How hot is too hot for a greenhouse?
Most vegetables start suffering above 90°F, and sustained temperatures above 100°F can kill seedlings within hours. A sealed greenhouse can climb 40–50°F above outside air temperature, which means even a mild 65°F spring afternoon can push the interior past 110°F. Ventilation, both passive (windows) and forced (exhaust fans), is non-negotiable. If your greenhouse regularly exceeds 90°F with the vents open, add shade cloth to the south-facing side.
When should I start planting in a greenhouse?
In USDA Zones 5–7, you can start cool-season seeds (lettuce, spinach, kale, broccoli) on heat mats as early as February. Warm-season crops like tomatoes and peppers go in 6–8 weeks before your last frost date. Your local cooperative extension service publishes exact planting dates for your county. The greenhouse gives you a head start, but it does not change your zone's frost calendar unless you add heat.
Do I need to heat my greenhouse?
Not necessarily. An unheated greenhouse extends your season by 6–8 weeks on each end and protects cold-hardy crops through mild winters. In Zones 6 and warmer, many gardeners grow greens like lettuce, kale, and spinach through winter without any supplemental heat. In Zones 3–5, you will need heat if you want to grow through the coldest months, and the insulation value of your greenhouse panels, particularly multi-wall polycarbonate vs. single-pane glass, determines how much that heat costs.
How do I keep my greenhouse warm in winter?
Start with what costs nothing: a layer of floating row cover draped directly over your plants inside the greenhouse adds 5–8°F of frost protection. For mild cold snaps, a ceramic space heater with a built-in thermostat is the simplest option. For sustained cold in Zones 3–5, a dedicated greenhouse heater with an external thermostat gives you reliable overnight protection without running all day. If you add a space heater, use a dedicated electrical circuit rather than the PowerPort™, which is designed for low-draw accessories like grow lights and fans. The better your glazing insulates, the less you spend keeping it warm. Multi-wall polycarbonate loses far less heat overnight than single-pane glass.
What are the best greenhouse plants for beginners?
Lettuce, herbs (basil, cilantro, parsley, mint), tomatoes, peppers, and spinach are the best greenhouse plants for beginners. These crops tolerate inconsistent watering and temperature swings, produce quickly, and teach you the basics of greenhouse growing without punishing mistakes. Resist the urge to plant a dozen things at once. A focused first season with five or six crops you genuinely want on your plate teaches you more about your greenhouse than a packed shelf of half-attended seedlings ever will.
What temperature should a greenhouse be?
For most vegetables, aim for 65–85°F during the day, with warm-season crops happiest at 75–85°F. At night, keep tomatoes, peppers, and cucumbers above 55°F, since growth stalls below that and stops below 50°F. Lettuce, spinach, and other cool-season crops tolerate daytime highs in the 55–75°F range and can handle brief dips to freezing. A min/max thermometer is the easiest way to track whether your greenhouse is staying in range.
Can you grow in a greenhouse year-round?
Yes, with the right crop choices and, in colder climates, some supplemental heat. In USDA Zones 7 and warmer, cold-hardy greens like lettuce, kale, and spinach can produce through winter in an unheated greenhouse. In Zones 5–6, adding floating row cover inside the greenhouse extends the fall harvest into December or January. In Zones 3–4, year-round growing requires a heated greenhouse with well-insulated glazing — 4-wall polycarbonate is the most cost-effective option for retaining that heat.
Do I need to harden off greenhouse plants before transplanting outside?
Yes. Greenhouse-grown seedlings are accustomed to stable temperatures, low wind, and filtered light. Moving them directly outdoors is a shock that can stunt or kill them. Hardening off means gradually exposing your plants to outdoor conditions over 7–10 days. Start by setting them outside in a sheltered, partially shaded spot for 2–3 hours on day one, then increase the time and sun exposure each day. By the end of the week, they should be spending full days outside and tolerating direct sun and light wind. Bring them in if nighttime temperatures drop below 45°F for warm-season crops like tomatoes and peppers. Skip this step and you'll likely see wilting, sunscald, or transplant failure — even with plants that looked perfectly healthy in the greenhouse.
Leave a comment
This site is protected by hCaptcha and the hCaptcha Privacy Policy and Terms of Service apply.